Purpose
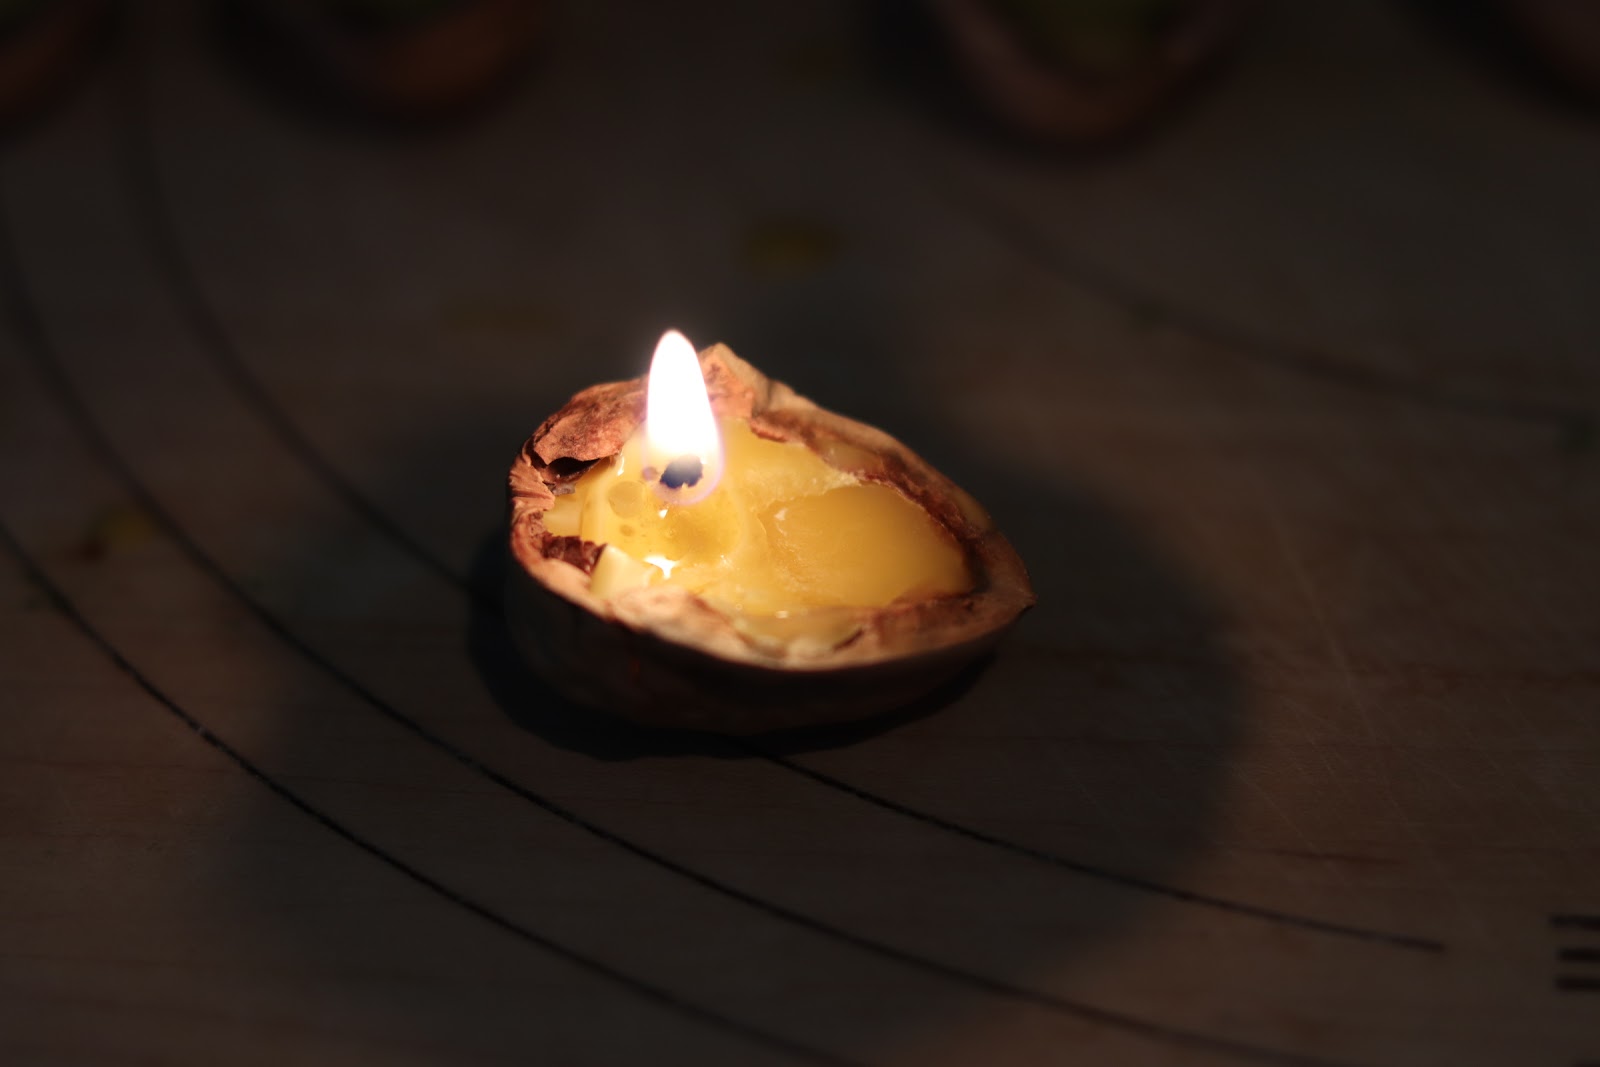
A wonderful addition to a Waldorf celebration, these lovely candles will float in a bowl of water.
Note that they do not last very long.
Be careful around little hands with the hot wax. And never leave candles unattended.
Materials Needed
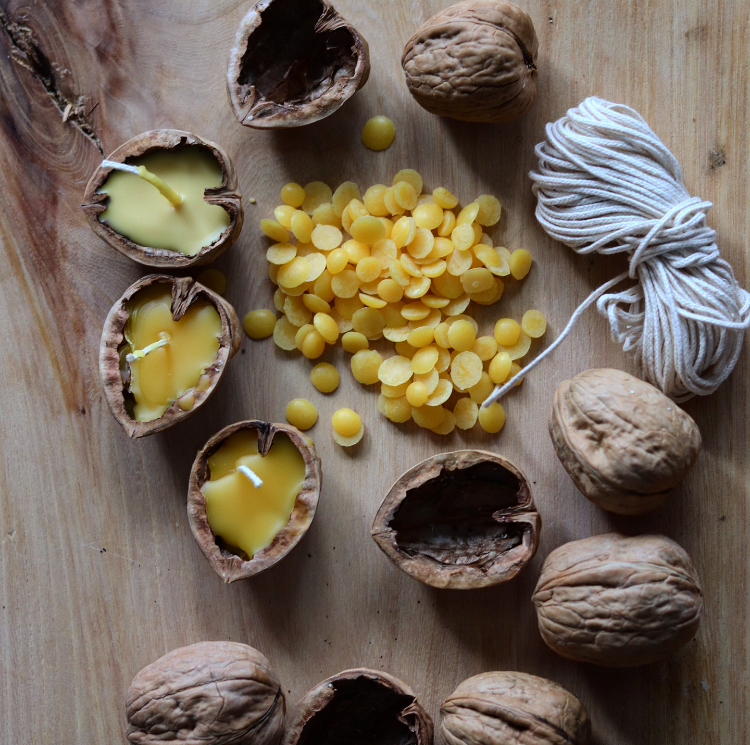
- Beeswax Pellets
- Cotton Wick
- Walnut Shells (halved and shelled)
- Scissors
- Pot filled with water
- Glass Jar or Metal Tin/container (for melting the wax)
Activity
Walnut Shells:
- Carefully split the walnut shell in half, and removed the nut from the shell.
- Set the empty walnut shells aside.
Candle Wick/Cotton Wick
- Use scissors to cut the candle wick about ¾ to 1 inch long. Set the cut wicks aside.
Beeswax Pellets:
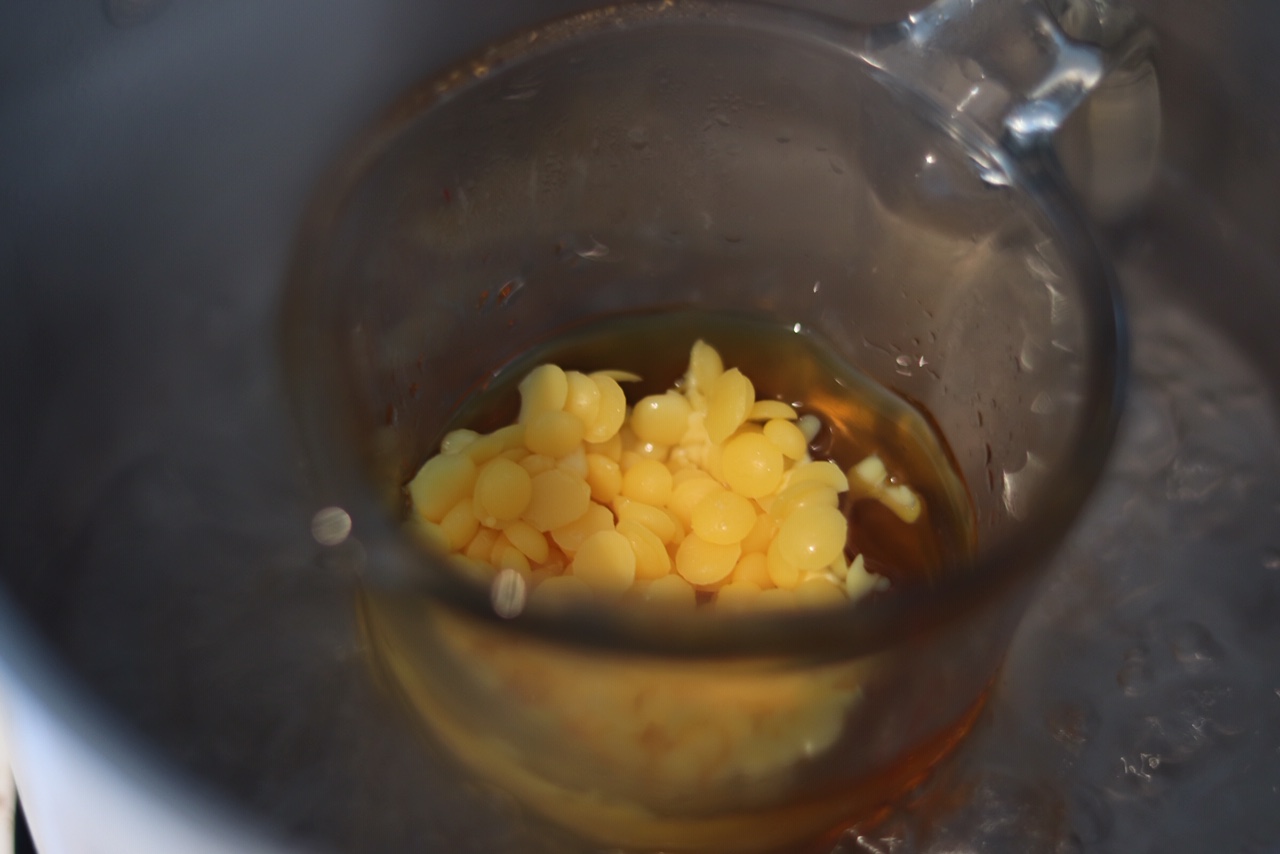
- To melt the beeswax pellets, fill a pot with a few inches of water. Bring the water to boiling temperature.
- Place the beeswax pellets in the metal tin/container. Place the metal tin/container in the pot with boiling water. *Note that the metal container might float, as if might be lighter than the water. You can use a glass measuring cup, but it will take much longer for the beeswax pellets to metal.
Putting it all together:
- Place a napkin down onto your work surface (I used a cutting board instead of a napkin).
- Place the walnut shell onto the napkin.
- Pour the melted wax into the walnut shell as close to the top of the shell as you can without spilling.
- Dip one of the wicks into the waxed shell. Set the dipped wick down onto the napkin. Wait for the wax to start hardening. Stick the dipped wax into the center of the shell. Be careful that it does not fall into the candle.
- Leave the filled shells to cool.
- Once cooled, your beeswax candles are ready to use.